Connecting to cse.unl.edu and other unix servers with ssh from Linux
Open a Terminal window. The instructions that follow are for Ubuntu Linux. Other distributions are similar.
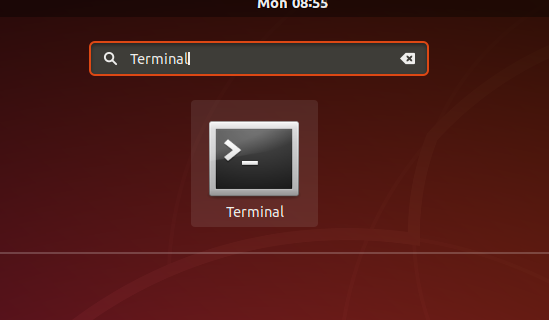
Click on the grid button in the lower left corner.
Enter "Terminal" in the search dialog that appears.
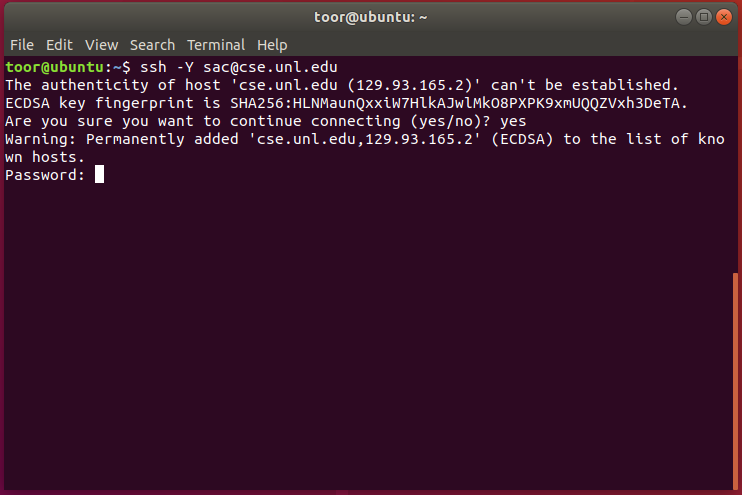
In the window that appears when you click on the Terminal icon shown above, enter "ssh -Y username@cse.unl.edu". Substitue your cse user name for "username" in this command. You can omit the "-Y" flag if you do not want to use ssh X forwarding (and if you don't know what this is, you can safely omit it). The examples below use a user name of "sac".
The first time that you connect to cse.unl.edu, or any other Linux/Unix server, a dialog like that shown above will appear. Answer "yes" to this.
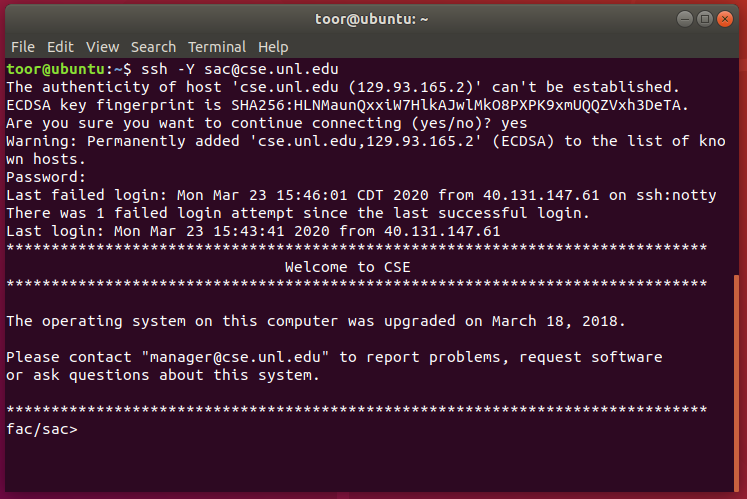
Then enter your cse password.
How to reset your MySQL password on cse.unl.edu
Resetting MySQL Password
If you have forgotten your MySQL password, reset your MySQL password by going to https://cse.unl.edu/account. Log in using your School of Computing (SoC) credentials and click the 'Reset MySQL Password' link. A new randomly generated password will be sent to you via email.
Changing MySQL Password from the MySQL CLI
If you know your old MySQL password, the password can be changed from MySQL workbench or from the MySQL command line interface (CLI). To chance your password from the CLI, connect to cse.unl.edu, run the MySQL client, once connected, enter the following command at the MySQL client prompt: 'set password=password('####');' and hit enter. Where '####' denotes the password you wish.
Connecting to the Windows Terminal Server from Linux
The instructions that follow are for Ubuntu Linux. Other Linux distributions are similar except for installing the "Remmina" program.
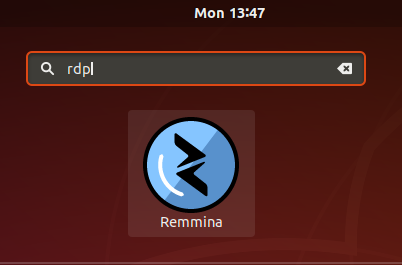
Click on the grid icon at the lower left of the screen.
In the search dialog that appears enter "rdp". The Remmina application should appear in the results. Click on that icon.
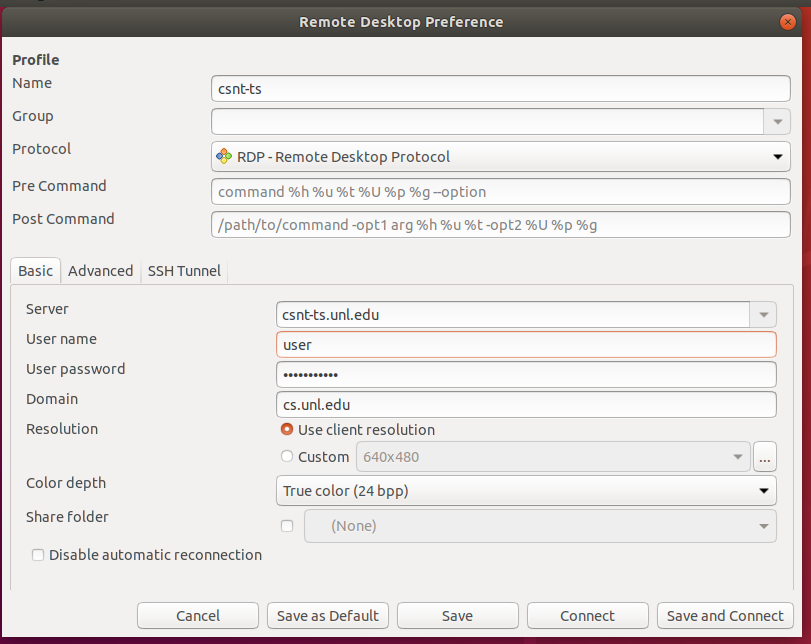
In order to connect to our terminal server you need to add a customized connection. Click on the green "+" symbol in the Remmina program and enter the following information:
Profile name: csnt-ts (or another name that you'd like to use).
Server: csnt-ts.unl.edu
User password: your CSE password
Domain: cs.unl.edu
Color depth: True color (24 bpp)
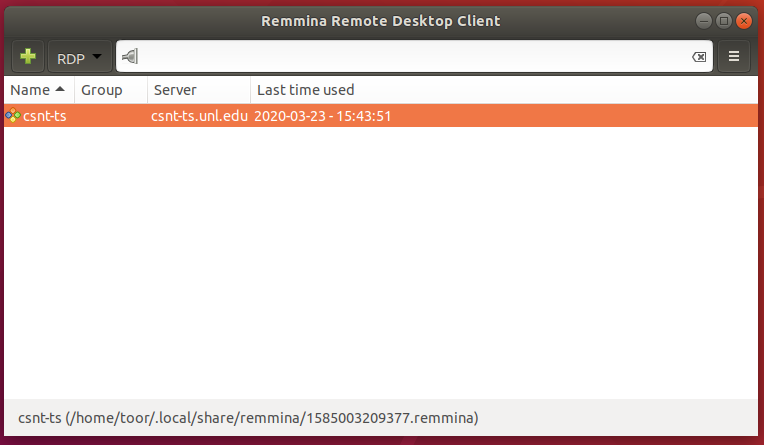
And then click the "Save" or "Save as Default" button.
Double click on the session you just saved.
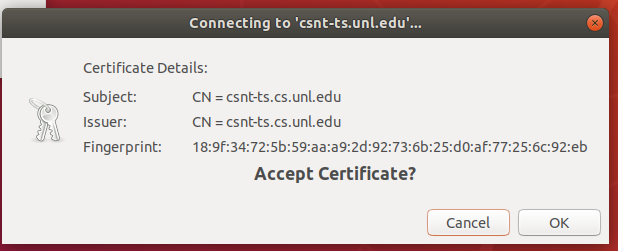
A dialog may appear asking you to accept a certificate for csnt-ts. You should accept the certificate.
Accessing School of Computing systems using NoMachine - Remote X11 GUI access
NoMachine is a fast, multi protocol remote access client which allows RDP and X11 type connections to a variety of servers. We have a NX server installed on two servers; cse-linux-01.unl.edu and cse.unl.edu, which allows GUI X11 Desktop access to either of these systems. Below are steps on setting up a noMachine connection to cse-linux-01.unl.edu.
You can download and install NoMachine from https://www.nomachine.com/
To configure a new connection, after you launch noMachine:
- from the Recent connections pane, click on ‘New’
- for Protocol select NX
- In the Host input enter ‘cse-linux-01.unl.edu’
- for Authentication method select Password
- select the Don’t use proxy radio button.
- Name your connection and finally click on Done
Once you have configured a connection to establish a connection:
- from the Recent connections pane, double click on the named connection
- Enter your MyRed login credentials for the cse-linux-01.unl.edu server (username and password)
- Double click on the Create a new virtual desktop icon

- Click thru the next four dialogs that provide you an overview on using noMachine
For connection to the legacy cse.unl.edu server you must use a CSE login and password, which is separate and distinct from your MyRed login and is only used to connect to SoC legacy servers and web applications. You will not need a CSE login unless an instructor or faculty member has told you that you need one to access legacy research or instructional tools and/or data.
Tip: You can save your password, the connection type, and click on Don’t show this message again on the dialogs for one-click connection to cse.unl.edu
Note: Please log off when you are done working on cse.unl.edu. Simply disconnecting the NoMachine client will consume resources on the server and your session will be forcefully quit at somepoint, possibly resulting in loss of any unsaved data or settings.
Linux SMB Printing
The example provided depicts the GUI interface provided by the Ubuntu Linux 20.04 LTS distribution. Note: Printing only works when you connected to a University of Nebraska network.
Prior to setting up printing, you need to install some prerequisite programs. This can be done with the shell-prompt command "sudo apt install psutils python3-smbc smbclient" there will likely be a number of dependencies that also need to be installed when you issue this command.
-
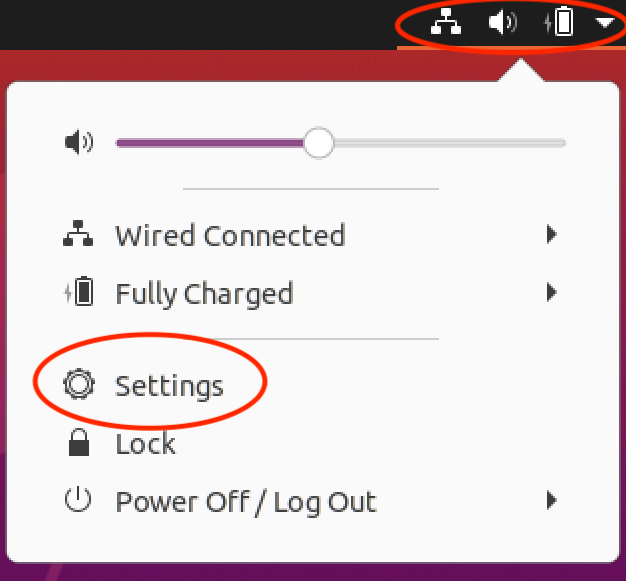
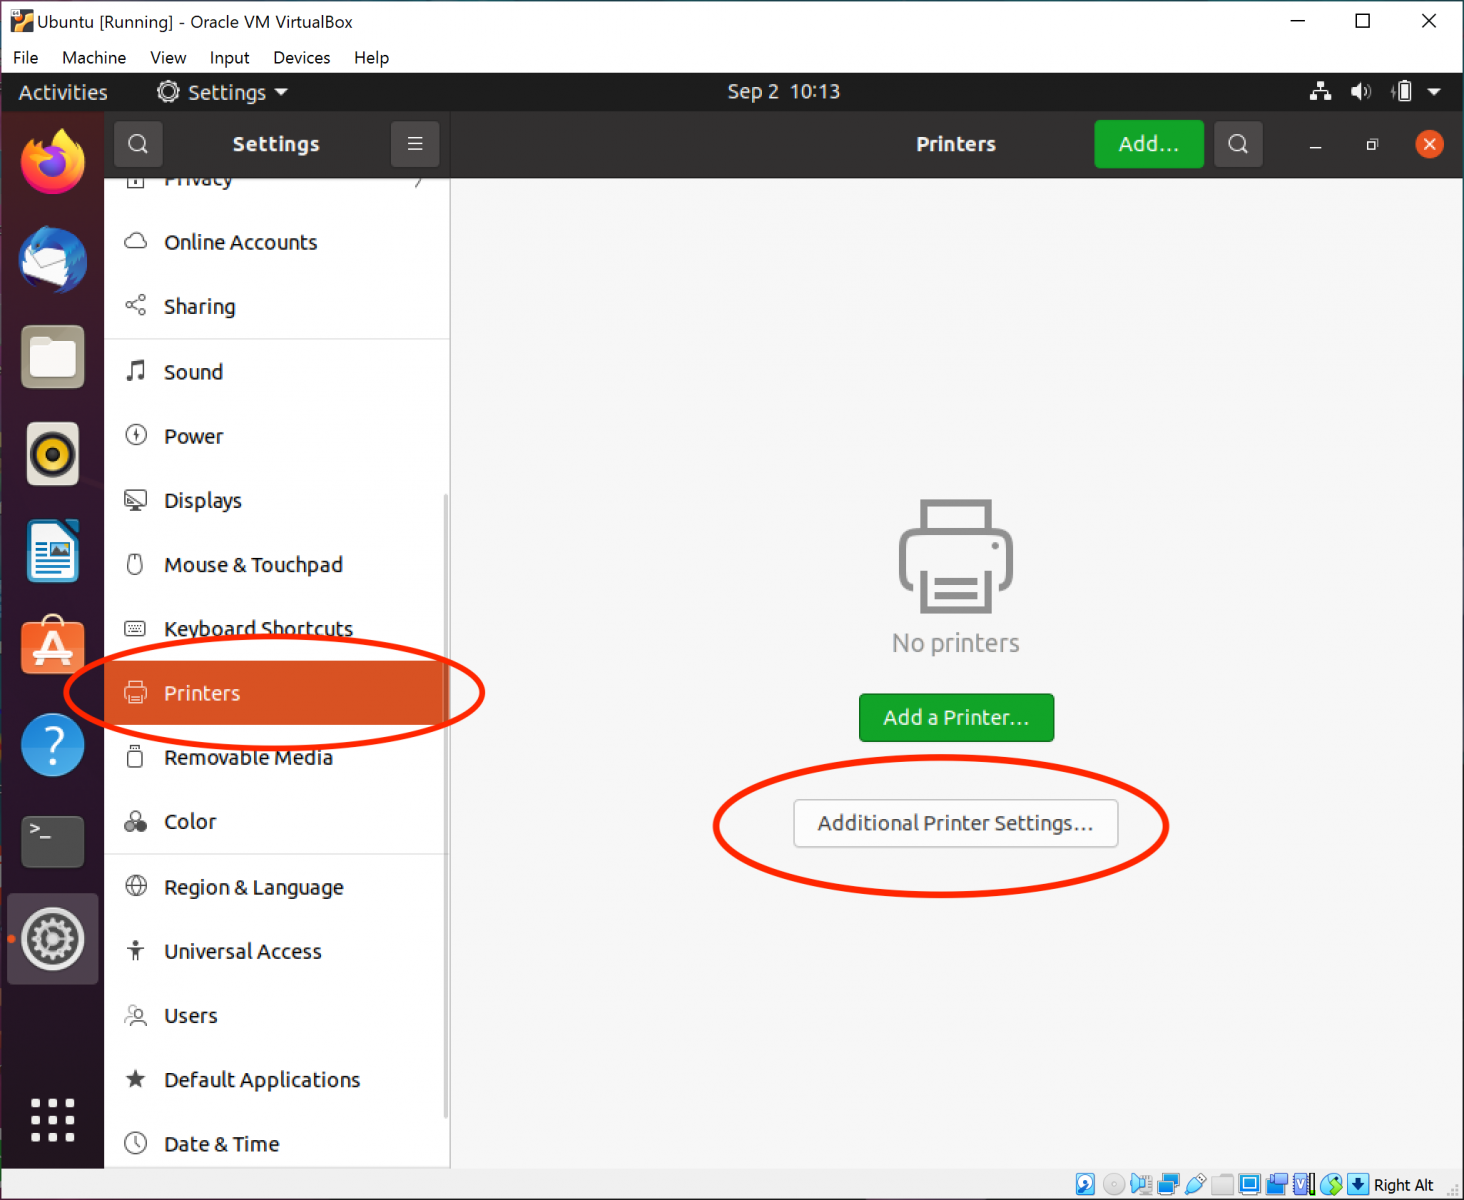
Open System Settings by clicking on the icons in the upper right corner and select "Settings".
-
Select Printers on the left and then click "Additional Printer Settings..."
-
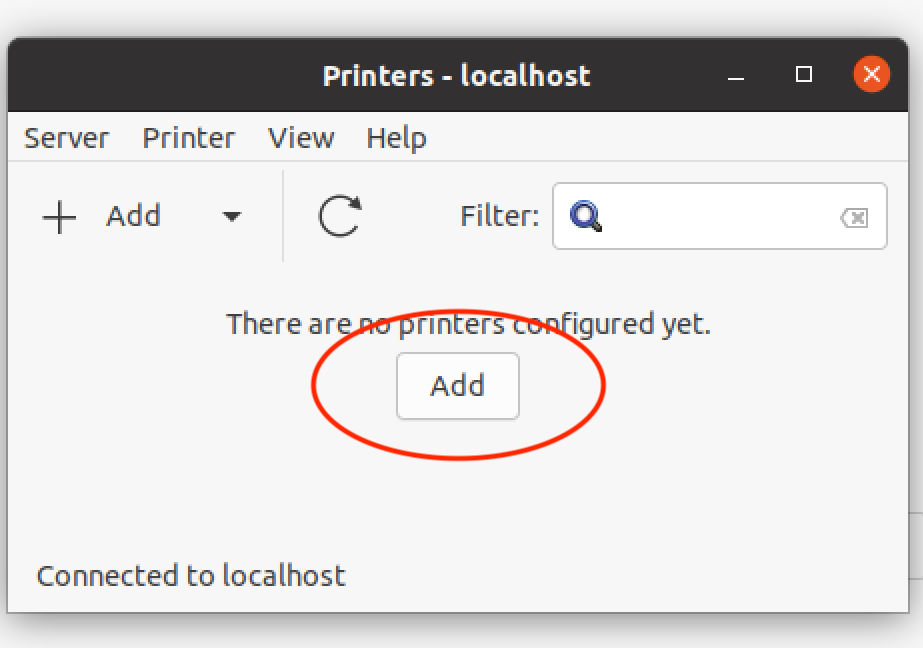
Click on Add:
-
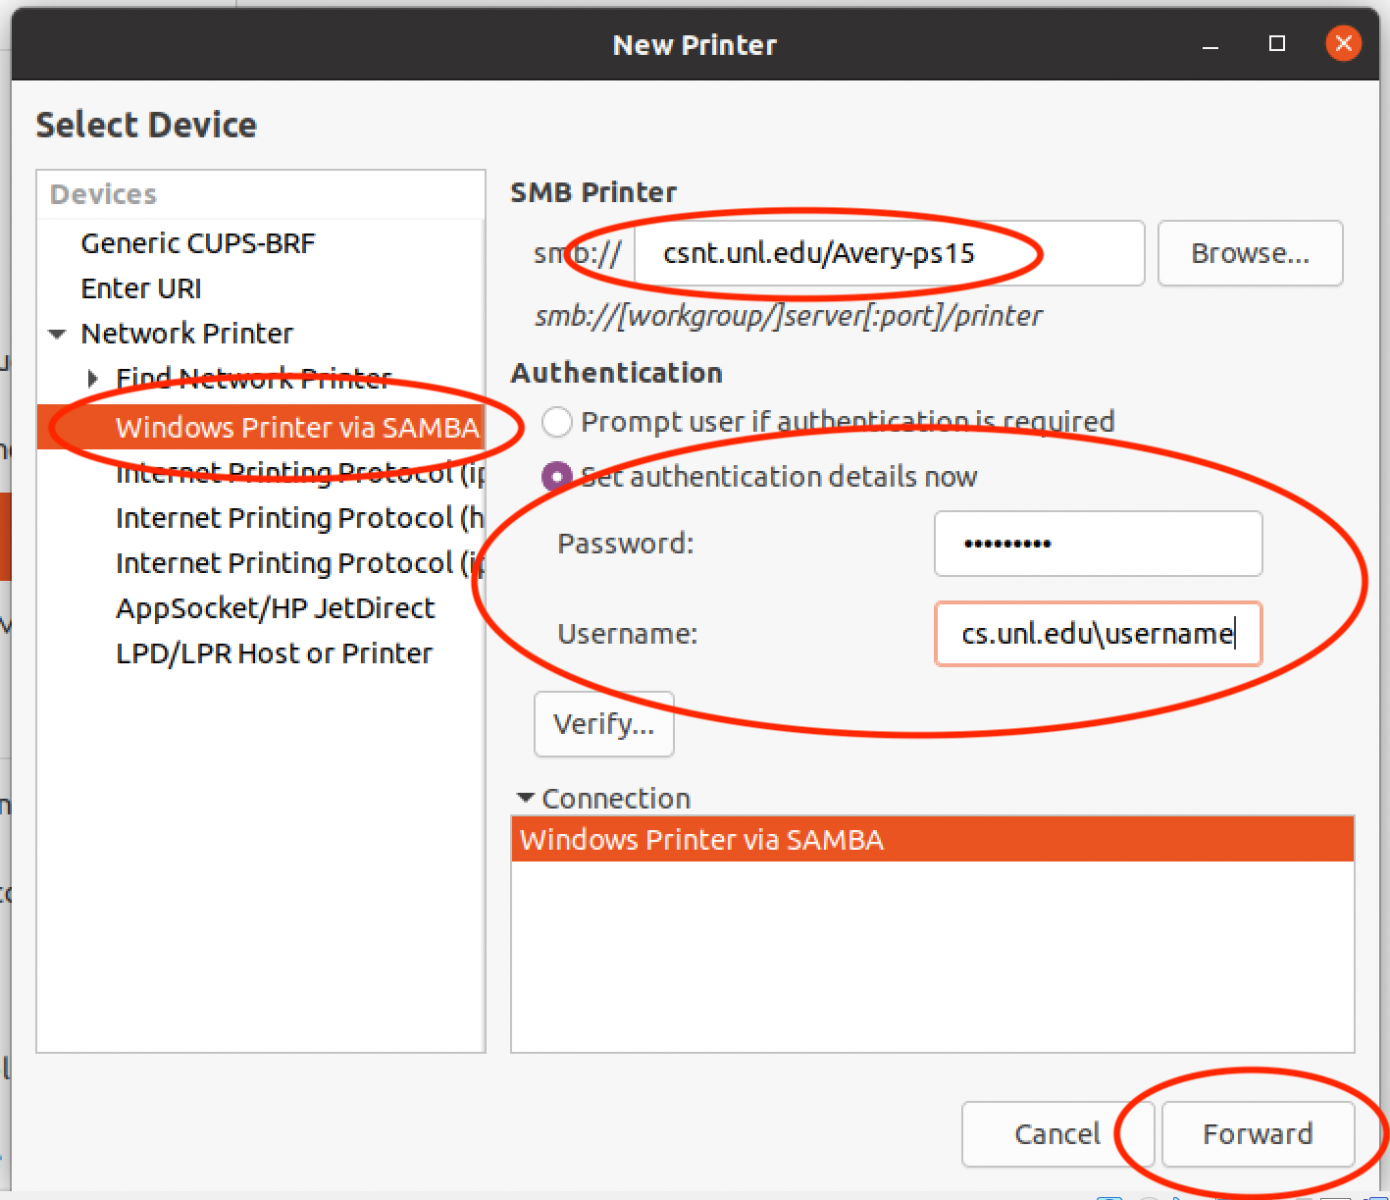
Select "Windows Printer via SAMBA" Enter csnt/ and the name of the printer that you want to add such as "Avery-ps15" and select "Set authentication details now" if the option is presented. For your login credentials, you should use your CSE login username inserting cs.unl.edu\ before your CSE username, e.g. cs.unl.edu\username. Complete the administration of the printer by entering your password and click Forward:
-
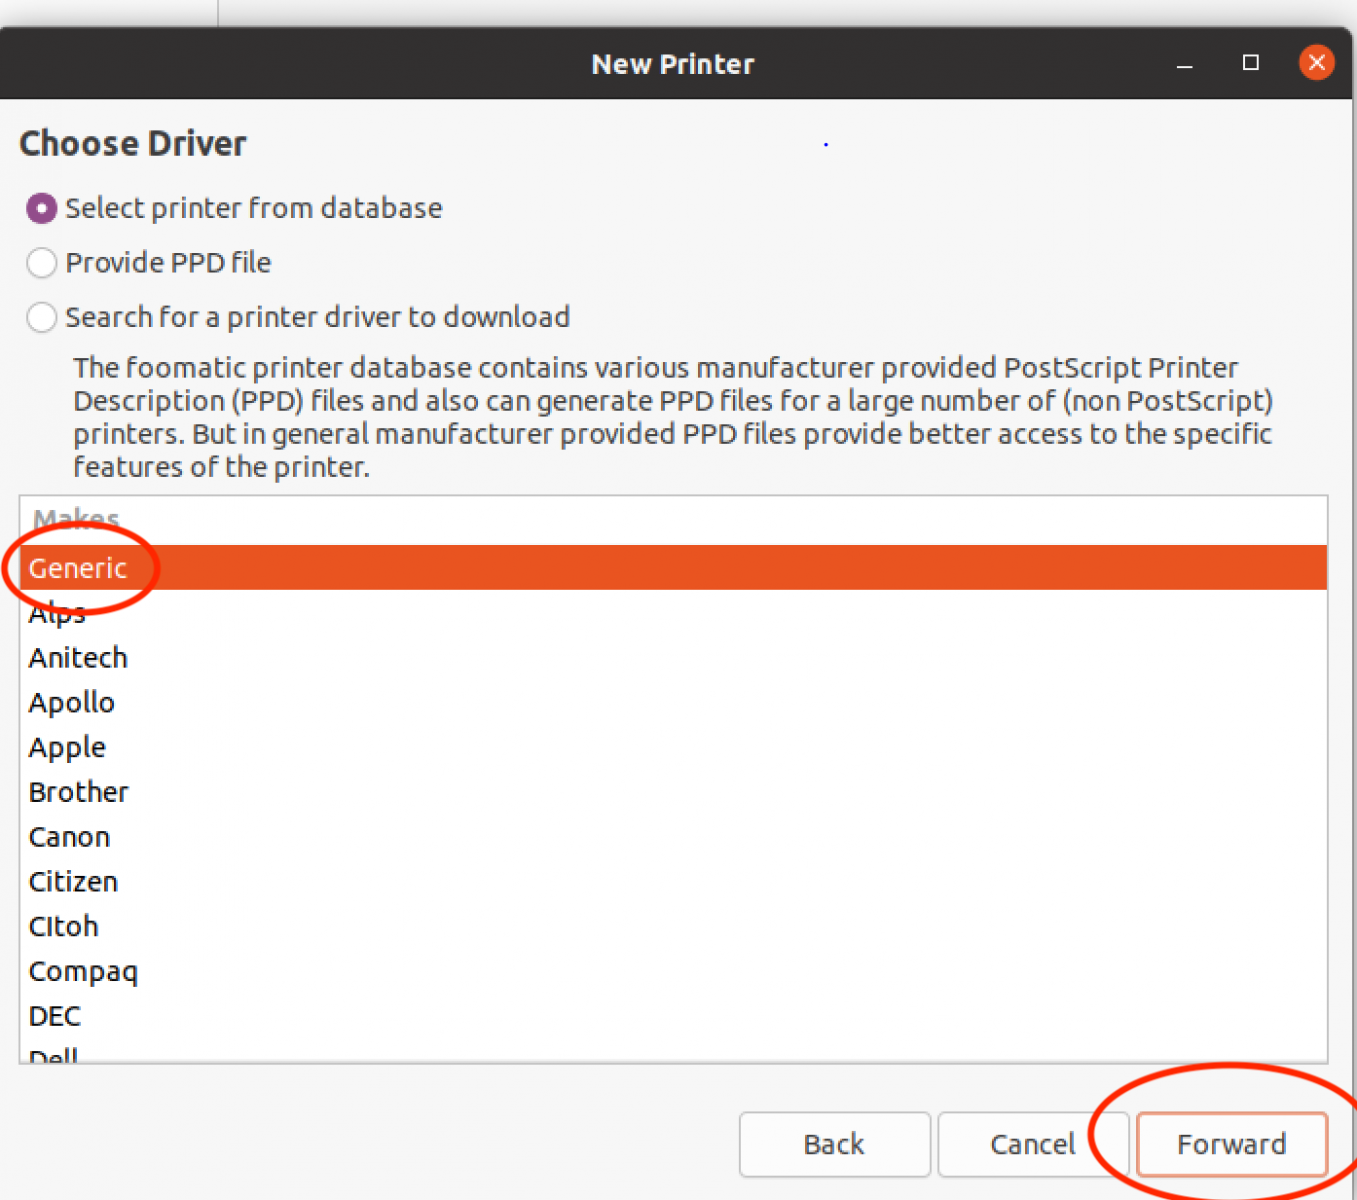
Select Generic and click Forward on the next window:
-
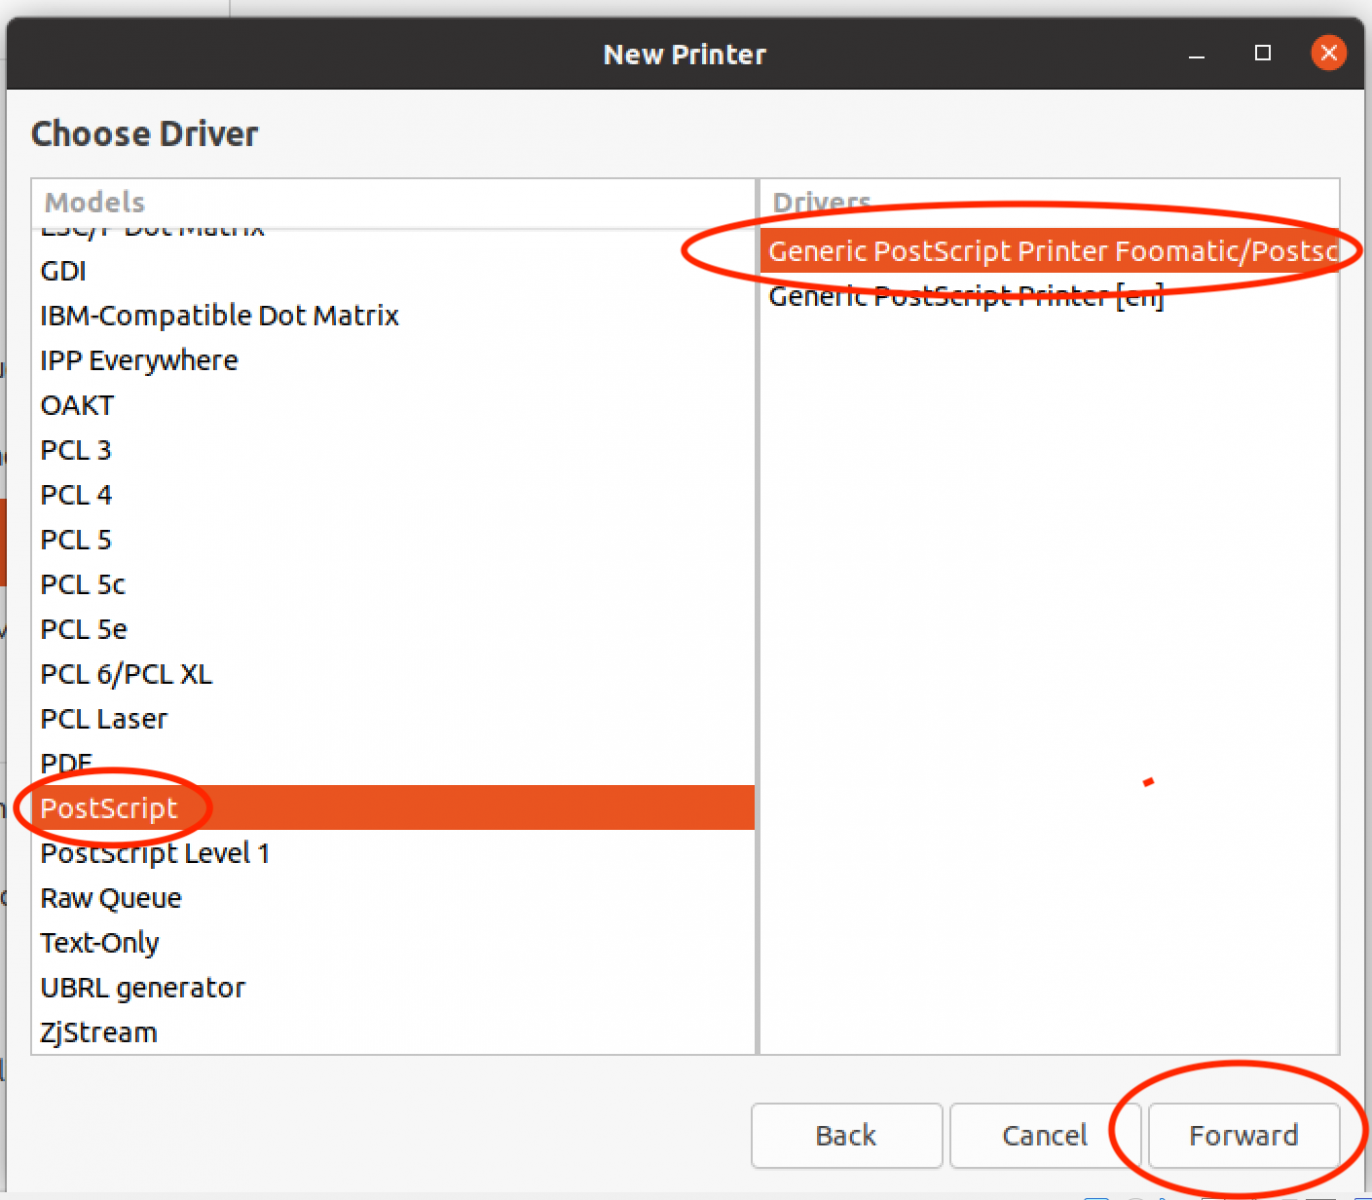
Select PostScript in the Drivers column of the next window and select Generic PostScript Printer Foomatic/Postscript [en] (Recommended) column and then click Forward:
-
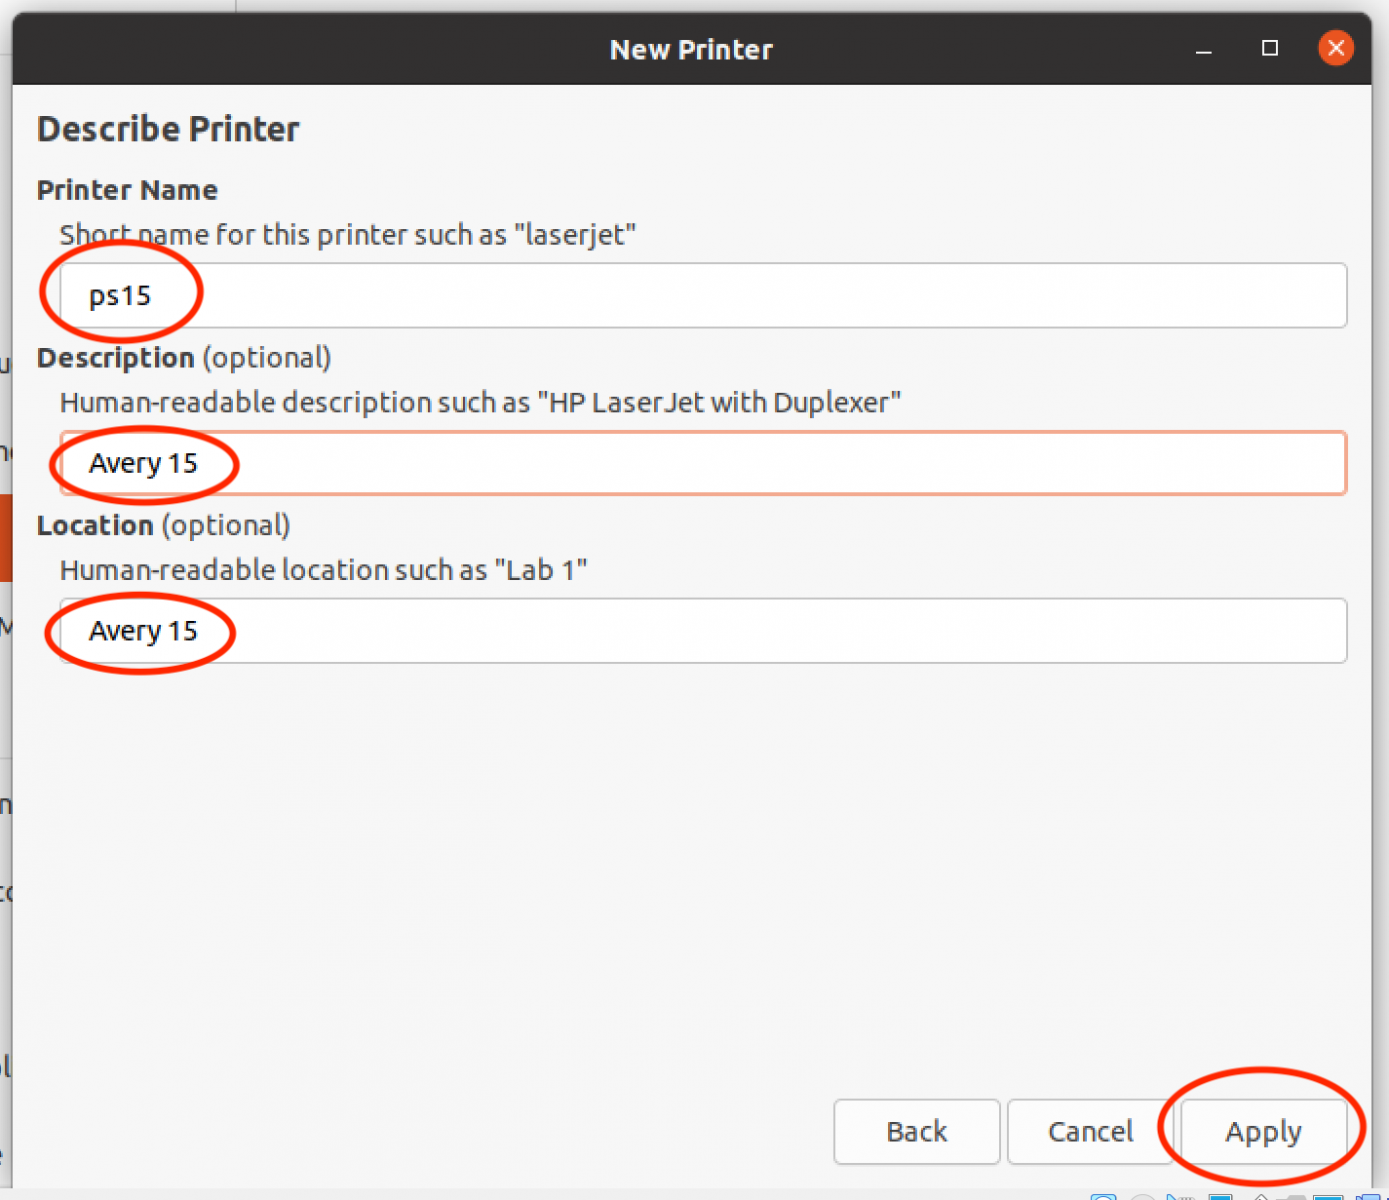
Enter a short name for the printer, such as "ps15", and a "Human-readable" name for the printer such as "Avery-ps15" and then click Apply. The short name can be used later for command-line printing and the "Human-readable" name will show up in print applications that use the system's GUI.
-
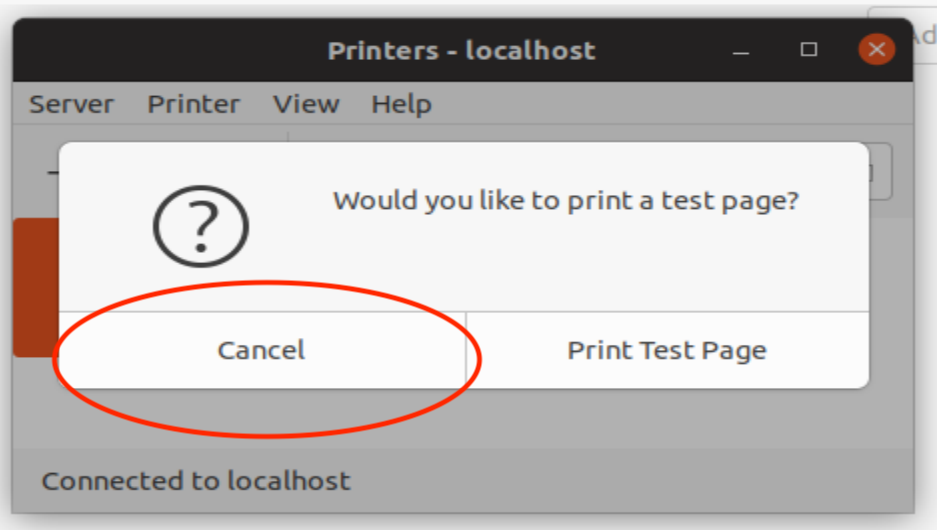
You can click Cancel on the popup window or click Print Test Page. The test page will be deducted from your print quota if you choose to print it.
-
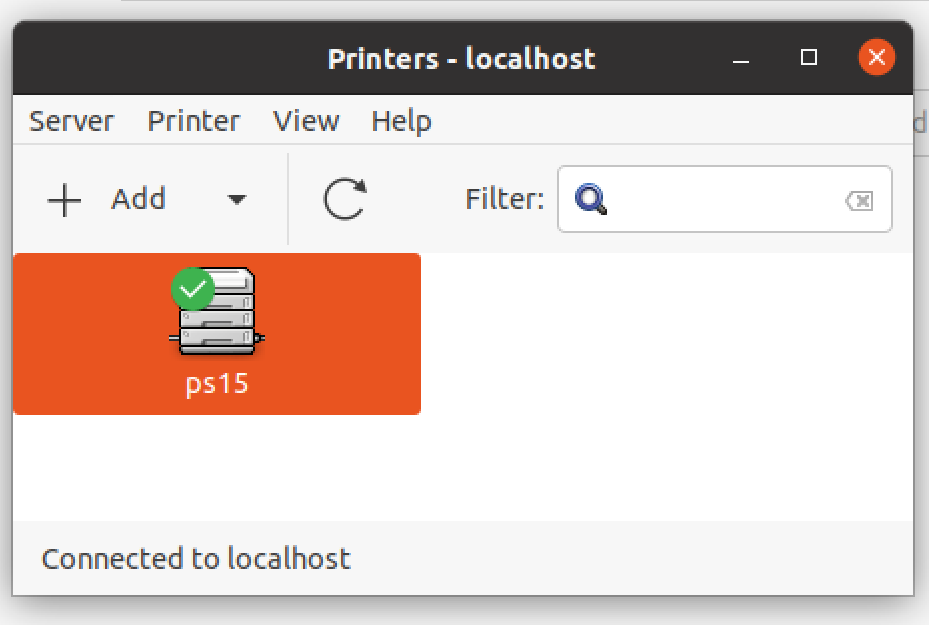
If everything worked as expected you should see the printer.
If you encounter the error: CUPS server error "client-error-not-possible" or a similar error from the CUPS subsystem, you will need to install the smbclient package, and perhaps additionally the samba or smb-common package, using the package manager provided with your Linux distribution.
Linux Mint uses very much the same procedure except instead of being called "System Settings" the system configuration application is called "Control Center". Other Linux distributions are similar.
If you want to take advantage of more advanced printer features, such as duplexing or stapling, you can use a printer-specific driver for the printer models as seen at the bottom of Printing from Mac via SMB 10.8+ section of this FAQ
VMware Installation using D2L Brightspace
VMware Installation
Local Virtual Machines in the School of Computing (SoC) are generally run under VMware Fusion or Workstation. This and other VMware products are available to SoC students through VMware's Academy Software Licensing program (which is hosted by D2L Brightspace). This service replaces our previous subscription service to VMware OnTheHub.
Downloading VMware Products
Start by requesting a subscription to the VMware Academy Software Licensing Program via the SoC account management portal as outlined below.
- Visit https://cse.unl.edu/account.
- Login with your cse.unl.edu credentials.
- Click on the Account Settings link.
- Check the "VMware Academic Software Program (D2L Brightspace)" checkbox and save your settings.
This will initiate an account request using your huskers.unl.edu email address. You should receive an email with a link by the next business day. Once you receive the email, click on the link provided for download access.
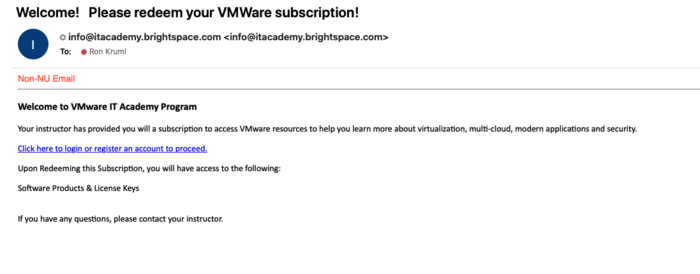
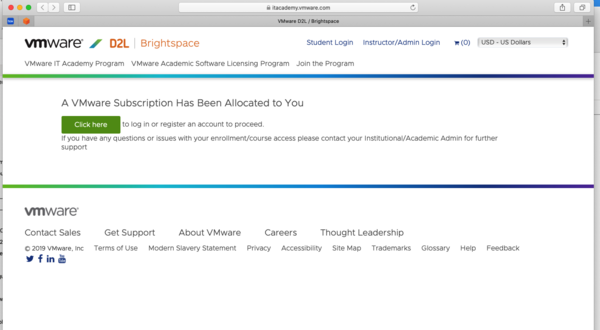
The link leads to a following page. Click on the 'Click here' button to proceed.
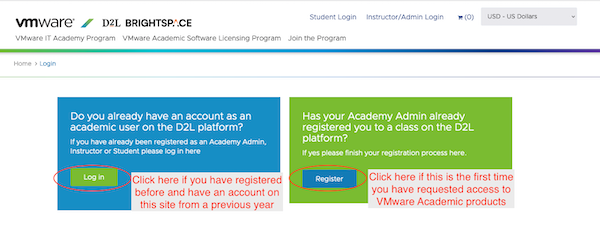
If you already have a D2L account, click on Log In, otherwise click on the Register button.
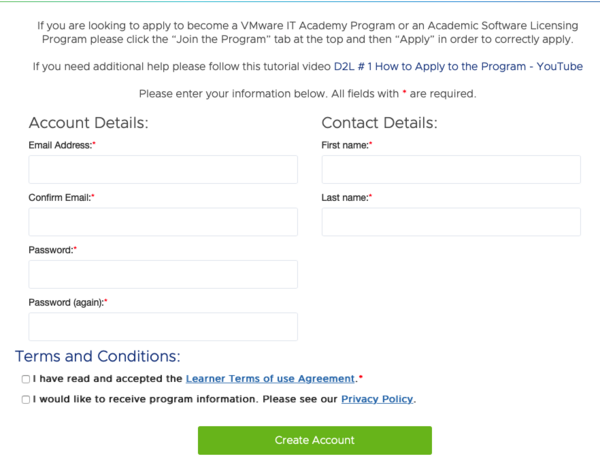
Complete your registration if you clicked on the Register button above, otherwise skip this step.
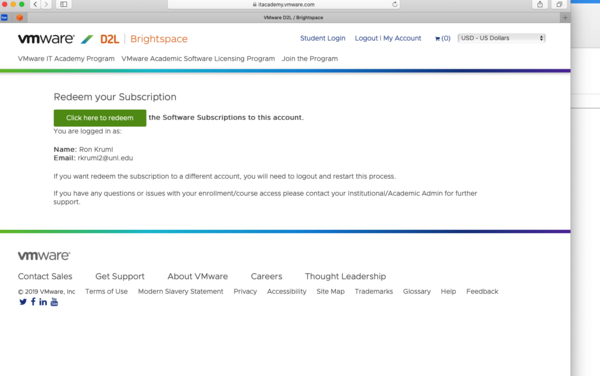
On the next page, select the "Click Here to Redeem" button.
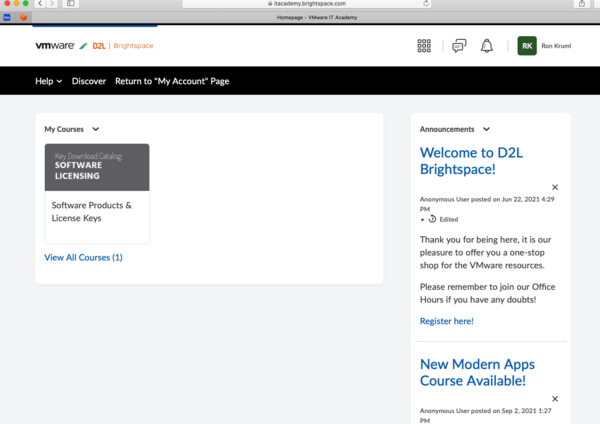
Click on the "Software Products and License Keys" button presented on the next page.
The left column of the screen shows the steps to request the VMware software and obtain the 1-Year License Key. The right column contains the download links for your software. VM Workstation is for PC's and VMware Fusion is for MAC.
At this point, you will install the downloaded VMware client and apply the license.
Notes:
- Product licenses issued through the VMware Academic Program are valid for one year from date of issue.
- Access to VMware Academic Program subscription (D2L) site are reset every October.
– In effect, if your VMware product license has expired, you will need to re-request a subscription to the VMware Academic Software Licensing program by following the instructions on this FAQ Section: Downloading VMware Products, in order to access new versions of VMware products or licenses.

